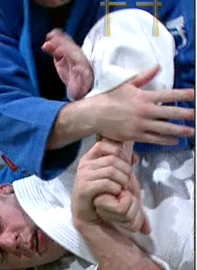
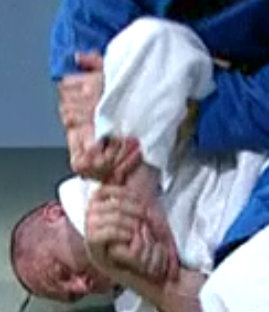
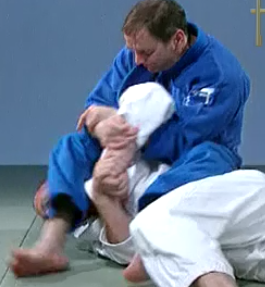
Saturday, 26 February 2011

Dealing with a Stiffy


The biggest bane of a beginner Judoka’s life is when standing randori rolls around. When facing black belts this means lots of airtime and tough landings. When facing other beginners it means the exhausting and dispiriting process of trying to do anything you’ve been taught as your partner shoves two iron bars in your chest and moves their entire lower body and legs as far away from you as possible.

All the throws you’ve been taught where your partner stands up right and you’re able to enter and get underneath now seem like they were dreamt up by some fantasist who’d never even seen a randori let alone done one.

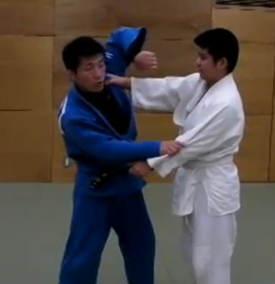
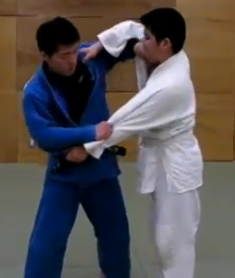
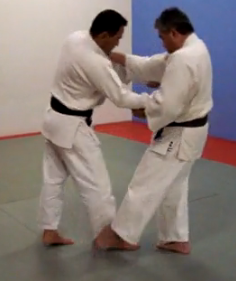
You are encountering the number one enemy of aspiring Judoka everywhere – stiff arming.

There are countless threads on Judo related forums across the internet where beginners seek to find answers to this problem in those threads there is some good advice and some bad advice.

The number one piece of bad advice given is that of the silver bullet.

Anyone who tells you that the solution to stiff arming is to be found in a single technique is misguided. The solution to any beginner’s problem is never found in a single technique it is always found in the fundamentals.

The Club

Perhaps the most dispiriting aspect of stiff arming is that the main solutions to it lie outside of the control of a beginner and firmly in the hands of an instructor.

The main ways to overcome stiff arming during randori are:
·         Ensure falling confidence through good ukemi training
·         Instil trust in partners through properly supervised nagekomi
·         Instil control in throwers to ensure safer landings and easier ukemi
·         Delay standing randori, concentrating on newaza randori, ukemi, movement skills and nagekomi. Until a basic competence in falling and controlling an uke have been established.
·         Supervised randori so that people are matched with partners who can practice with them safely and those who’re stiff arming or purely being defensive are reminded and encouraged to be positive.

However, as a beginner you have no influence over how a club is run, nor do you have the technical knowledge or technical ability to run or design these drills.

You

Probably the  simplest thing you can do is to be selective about who you practice with everyone knows who the worst stiff arm offenders are and those whose idea of a standing randori is stomping around for five minutes, like a zombie bent over at the waist. Try and minimise the number of practices you have with these guys try and fill your randori slots with positive Judoka, usually these are the higher grades.

This of course may not be feasible in a small club with say only 10-15 members. In this case the number one thing to do is to communicate with your partner. Don’t lecture, don’t hector, don’t try and come off as their superior giving them instructions. However, try and suggest in a polite, constructive and humble way that you would like to do a more positive randori and focus on not being defensive and would they try and help you out. Also try pointing out politely how it’s not only wasting your practice time, but also theirs if they just spend 5 minutes being defensive without ever attacking.

If you feel able to without coming across as an arse, try and have a word with your instructor to see if they can help you out by cracking down on stiff arming with reminders and encouragements to be positive.

Of course there are those who simply won’t listen to polite reason, or to coaches. In this case I suggest a firm, open palm slap to their annoying twat face.

Alternatively...

Movement

 You can try using movement to create opportunities to get around stiff arms.

Now I have previously talked about T-ing up extensively and reference it quite a lot.

If you’ve been following since the beginning on Bullshido then you should have had a few months of practicing this under your belt and it should be starting to sink in. If not and or you haven’t read that article, first read it and then come back to this.

Now here’s an example of how to take the principle of using movement to break down Jigotai, but apply it in a totally unrealistic way.


My issue with this video is that it assumes that a partner will move in a way that catastrophically destroys their balance and will remain there whilst you move around them. In a way its the Judo equivalent of this:


Probably a little harsh, but you get the general idea. Unrealistic reactions from an uke lead to unrealistic responses from tori in a way that makes the application of what is taught unworkable in an alive scenario, like randori.

A much better example is the first minute and a half or so of this old favourite of mine


As I’ve already spent time breaking down and explaining that video in the T-ing up thread I won’t repeat myself here. Except to say that the more you move and importantly the quicker you move the less effective stiff arming will become and the more opportunities will present themselves. Of course you must match your tempo to your ability and size what is moving quickly for a 66kg/145lb 2nd dan is completely different from what is moving quickly for 100kg/ 220lb green belt. So don’t go crazy trying to spas run round the mat, keep controlled, keep a good grip and just step up the pace of your normal movement patterns.

Ashiwaza

Although there is never a one technique answer to a beginner problem or even a group of techniques. In the case of stiff arming and purely defensive postures ashiwaza can be useful. Although they’re not always useful, if you’re 5ft 7 trying to do ashiwaza on a guy who’s 6ft 2 and stiff arming whilst bending over, ashiwaza are obviously not going to help you. Flapping your legs around a metre away from their ankles is obviously going to achieve nothing and be just as frustrating as the stiff arming.

If you’re thinking at this point, hold on, my coach is 5ft 7 and I’m 6ft 2 and he’s always foot sweeping me. Well your coach is probably at least a 2nd dan with 10-20 years Judo experience. So this is one of those situations where a massive technique gap can overcome a physique gap.

So, when there isn’t a massive size disparity they can come in useful. This is because you can disrupt your opponent’s movement and stepping patterns that open up opportunities for throw attempts. Ashiwaza also tend to have the effect of relaxing their arms as your partner worries about their feet more than their upper body.

Pretty much all of the ‘minor’ ashiwaza are applicable:

De ashi barai
Ko soto gari
Sasae tsurikomi ashi
Okuri ashi barai
Ko uchi gari

Remember to try and stay controlled and not just wildly hack away at your partners ankles, easier said than done. To ensure that you’re on balance and capable of reacting to any opening your attack may create.

Grip fighting

I’m a strong believe in beginners minimising the grip fighting that they do during randori. Note that I have quite specific definitions for what I consider to be grip fighting and two categories within that as opposed to gripping.

To me gripping is the key concepts of control over your opponent using the gi eg. breaking your opponents posture whilst keeping the elbow down with a high collar grip, turning the palm outwards when gripping the sleeve to maintain control over your opponents hikite etc...

Grip fighting is the actual act of seeking, breaking or avoiding a grip. To me grip fighting can be broken down into positive and negative grip fighting. Positive grip fighting is where you break your opponents grip, or use grip fighting techniques to actively achieve your desired grip with the intention of throwing. Negative grip fighting where you just try and frustrate your opponents Judo without seeking to obtain you ideal grip in order to throw your opponent.

Negative grip fighting has no place in a beginners randori experience.

However, sometimes it is an option to consider to break your opponents grip in order to facilitate you attacking and throwing them. I think for a beginner this should only be done in extreme situations where your partner is being excessively defensive, won’t listen to you or your coach and all your positive attempts to use movement, ashiwaza etc... have failed.

Tricks

Note these are tricks for a reason, they are not long term solutions to the issue, they are tricks.

Against a left hander, as a right hander, you should always endeavour to have the inside grip, by which I mean this.


From here, against a left hander you can raise your elbow to break the strong structure of their arm to give you space to apply the proper tsurikomi action like so.


It should go without saying that this is only really applicable for forward techniques.

An alternative trick is to apply a small amount of upwards pressure to uke’s elbow joint to cause a relaxation in the arm to relieve pressure and create an opportunity for an attack


Don’t try Sutemi waza and Makikomi.

These are often very popular suggestions on internet message boards, however, they are not good suggestions. The idea stems from a faulty logic that uke is leaning totally forward and so in keeping with the philosophy of Judo that softness should give way to hardness i.e if pushing forward you should just go with the push and you will throw them.

This is based on a fundamental misunderstanding of the mechanics of the throws suggested and also the balance of uke when they’re bent over in a stiff arm position. When uke is bent over and stiff arming their entire weight is being transmitted straight forward into tori. It is actually located underneath their stomach/chest.

Now this would seem to facilitate ideally a sutemi waza attack, however, because of the stiff arms tori is unable to actually get underneath uke’s centre of gravity. Getting underneath a partners centre of gravity for a sutemi waza is as hard if not harder than getting past their arms for an Uchi mata.

So what happens  in a makikomi attack is that tori either twists uke and they both fall straight forward, uke rolls out to side of the attack, or if there is a major size and weight advantage on tori’s behalf uke gets wrapped around them and rolled over.

In a sutemi waza tori tries to get in under uke’s centre of gravity, but because of the stiff arms and inexperience ends up just dropping straight down onto their arse. Usually uke will flop or sprawl ending up on top of tori, will flop/ sprawl out to the side of tori occasionally landing on their side, or if there is a major size and weight advantage on tori’s behalf uke gets taken over by the momentum and rolls over and onto their back.

This is not good Judo, nor is it a beginner attempt at trying to work towards good Judo. It’s just bad Judo all round and should be avoided if you want to make real progress in Judo.

Don’t try Standing armlocks and strangles

Standing armlocks and strangles are very difficult and very dangerous techniques.

I’ll repeat that.

Standing armlocks and strangles are very difficult and very dangerous techniques.

Standing armlocks in particular are incredibly dangerous, they are very easy to apply sloppily, very easy to apply with too much force, without control and very difficult to submit quickly enough to.

This is inevitable if you start doing standing armlocks on all and sundry


Please don’t try standing armlocks and strangles on people to get them to stop stiff arming, it is very dangerous and is going to end badly.

Hopefully that has been fairly comprehensive and has given you some positive ideas about how to deal with a stiffy as well as some ideas about practices to avoid.

Thursday, 24 February 2011

What’s the difference – Ashiwaza


Oh dear...

This new series inspired by blog poster Bob.

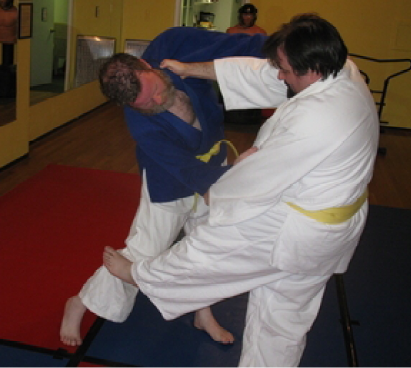
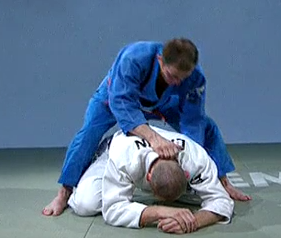
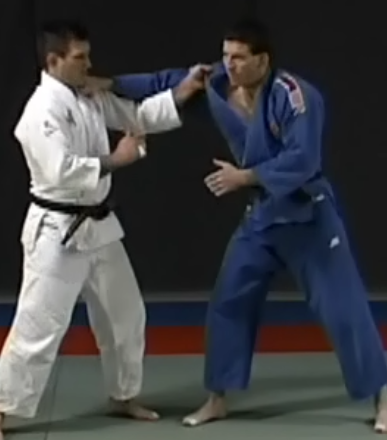
Ashiwaza are some of the most sublime and simultaneously frustrating techniques in the whole of Judo, except of course when butchered as in the photo above.

However, a lot of people tend to be rather fuzzy on what exactly the differences are between certain ashiwaza, what the principles behind them and the implications for the execution of the throwing action are.

When looking for reference to a technique or to clear up any confusion. You first go to, should be the Kodokan’s nage waza guide hosted on youtube at user tambietem’s channel
 

So many of your questions may well be answered by this video:


Some of them may not be though. So I will do a little exploration of the main ashiwaza and split them into groups where I believe the greatest potential for confusion lies. This is not a how to or proper breakdown of the techniques merely a cursory overview to help show the differences in principle and application of the techniques.

Ko soto gari and De ashi barai - What’s the difference?

The route of this confusion is between what constitutes Harai and Gari. Most often this is found in the question of whether a throw is a Ko soto gari or De ashi barai. People will often say the difference lies in whether uke's foot is taken in front of them or straight forwards.

De ashi barai

As opposed to, Ko soto gari


However, this can't be the case because in Harai tsurikomi ashi uke's foot is taken behind them and in O uch gari uke's leg is taken out to their side. So direction of leg movement is not the contingent factor for Harai or Gari classification.

O soto gari, O uchi gari, Ko uchi gari and Ko soto gari all have one consistent principle that is that the majority of uke's weight should already concentrated on the leg that is attacked. 
However, as many people know if you try and perform a De ashi barai on a foot that the majority of uke's weight is on then nothing will happen.

That is because the throwing principle behind Harai is weight transfer. The leg should be attacked as the majority of uke's weight is about to be transfered to or away from it. This is why Harai waza are much harder than Gari waza as the timing finesse in the fractions of a second when weight is about to be transfered away from or to a leg, is much more difficult to sense and react in time to.

And although all Judo techniques when performed in ideal conditions should be effortless the application of force to throw an opponent when the majority of their weight is already planted is greater than that when they are about to transfer their weight to or away from a leg. 

A good way to envisage the difference is if you imagine walking down a set of stairs in the dark. As you move down the stairs you weight your foot in expectation of planting your foot on the step. So when you reach the bottom of the stairs and think there’s an extra step when there isn’t you weight your foot expecting it to reach solid ground at a certain point yet you don’t. The result is you fall. This is the essence of De ashi barai, uke expects for his weighted foot to contact the mat but at the vital second you sweep it out and uke falls.
A good way to envisage Ko soto gari is to stand up and allow yourself to rock back onto just your heels. Probably best to this near to a wall or something to grab onto... Then try it again excepting rocking back so that just the heel of one foot is supporting all your weight and in contact with the ground. Then think about how little a clip or reap it would take to make you fall.

Okuri ashi barai, Sasae tsurikomi ashi and Harai tsurikomi ashi - What’s the difference?

As noted in the above examination of the differences between Ko soto gari and De ashi barai a key indicator of the difference between the throw can lie in the words that make up its name. In this case we have two throws that have ‘Harai’ in the name and two throws with ‘tsurikomi’ in the name. However, despite these crossovers the three throws couldn’t be more different.

Okuri ashi barai - translations of this technique’s name range from double leg sweep, to sending foot sweep, to assisting foot sweep. I’m not going to pretend I know the definitive translation, as I speak no Japanese. However, I understand enough to know that two of the defining aspects of this technique are that both feet are swept together and simultaneously and that it is a harai action.

So this means as explained above that the attack must come as a foot is either weighted or un-weighted and in addition that during the attack uke’s feet must come together as part of the sweep.


What is critical, however, is that there is no blocking action and no tsurikomi action to the technique.

Sasae tsurikomi ashi – sasae comes from sasaeru which means to block, tsurikomi is explained here and ashi means foot or leg.

So the critical factor to remember is that you should concentrate on applying the tsurikomi action, which should ensure that the majority of uke’s weight is forward and over his toes, whilst applying a blocking action to uke’s leg.


As a result Sasae tsurikomi ashi is usually done when uke moves forward/ shifts their weight forward or moves in a circular direction which leaves them out of equilibrium and their weight forward. Critically the blocking action should, ideally, occur in the middle of the process of weight transfer. So as uke un-weights his foot as he lifts it off the ground to advance, the blocking action should ideally come between his advancing foot passing the placed foot and the advancing foot being placed on the ground and becoming fully weighted.

Attempting to apply Sasae tsurikomi ashi when the foot is planted and fully weighted will usually prove ineffective unless your opponent is poor or you tsurikomi action very very powerful.

Harai tsurikomi ashi contains the similar tsurikomi element, however, without the sasaeru element.

Note, it is important that in Harai tsurikomi ashi you attack only one foot, the retreating foot, whilst applying the tsurikomi action.

Harai tsurikomi ashi is nearly always executed when uke retreats, this isn’t always an obvious retreat as in uchikomi or nagekomi. However, the principle, of retreat remains a constant.  This is probably one of the hardest throws in Judo so if you struggle with it, don’t be disheartened.

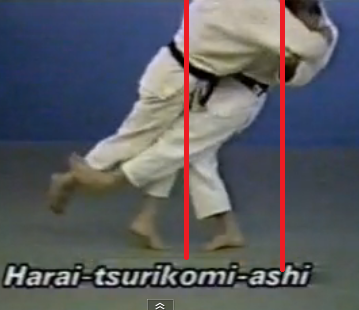
As uke retreats his weight tori applies the tsurikomi action shifting uke’s centre of gravity out and forwards. Whilst simultaneously entering and sweeping in the Harai fashion to accelerate the retreating action of uke’s foot so that it doesn’t touch the ground.

At this point the effect is as if uke’s weight has been loaded onto tori’s sweeping leg and hip, momentarily.

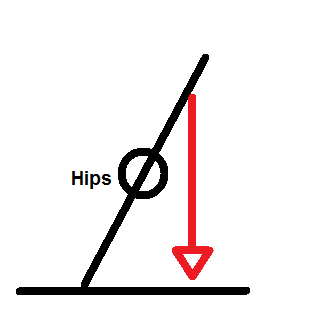
The red line indicates uke’s new centre of gravity


Uke’s centre of gravity in relation to tori


 The most common confusion arises between Sasae tsurikomi ashi and Harai tsurikomi ashi especially when performed with oikomi entries from unusual grips.

Here’s an example of a technique easily mistakeable for a Harai tsurikomi ashi, which is in fact a Sasae tsurikomi ashi


Its not until the final slow motion angle at 1:05 that you can clearly see that the leg is being used in a blocking or supporting action rather than in sweeping action, clearly making the technique Sasae tsurikomi ashi.

If you’re wondering why Muneta has Pikachu on his gi, it’s because he’s a big fan of Pokemon.

Sasae tsurikomi ashi and Hiza guruma - What’s the difference?

Another commonly confused pair are Sasae tsurikomi ashi and Hiza guruma due to their superficial similarity in a competition or randori. Most coaches will say that the key difference lies in whether the technique is applied to the knee or the shin and that would appear correct as Sasae tsurikomi ashi is always demonstrated on the shin and Hiza guruma, well its the Knee wheel so obviously its on the knee, duh.

However, you can apply Sasae tsurikomi ashi to uke’s knee and Hiza guruma to uke’s upper thigh - Daigo Sono san.

As I’ve already explained in depth the key principles underlying Sasae tsurikomi ashi, I will concentrate on Hiza guruma.

The most important difference in principle between the two techniques lie in the difference between the throwing action inherent in the sasaeru action and the kuruma action. Note that it is a convention to romanize the Japanese verb with a ‘g’ when following a vowel, however, to leave it as the original ‘k’ sound when it isn’t following a vowel i.e Harai goshi and Koshi guruma. Both share the word ‘koshi’ or hip when it follows a vowel it is Romanized with a ‘g’ when a standalone word it retains the original ‘k’ sound.

As explained sasaeru means to block or sometimes to support. Kuruma means to wheel, specifically to wheel around a fixed point. If you think that blocking and wheeling around a fixed point is some anal and esoteric distinction, then step back and think what other techniques are kuruma waza – Kata guruma, Koshi guruma, Ashi guruma, O guruma and O soto guruma. If you tried to ‘block’ with those techniques your throw would be a disaster, in all you must pivot around a fixed point whether it be shoulders, hips or leg. The same applies to Hiza guruma.

Most of the Kuruma waza where uke is pivoted around a leg are rare in competition because the immense difficult of pulling them off, Hiza guruma is one of them. A rare example pulled off by Delgado of Portugal shows quite well how uke is truly pivoted around the leg, rather than the leg blocking uke.


So if you attack uke’s leg and make contact at the knee, but the throwing action is effected by a block then it is a Sasae. If you make contact on the shin, but the throwing action is effected by pivoting uke around a fixed point then it is a Hiza guruma.

Now this is a very fine definition to draw in a competition and frankly the classification doesn’t really matter that much. However, where this distinction is important is in developing your own understanding of the principles of the two techniques so that you can understand what principles make the two throws different and so better apply the techniques.

More ‘What’s the difference’ to follow covering; Uchi mata/Hane goshi, Seio nage/Seoi otoshi and more upon request.

Wednesday, 16 February 2011

Juji Gatame Rolls Iatskevitch and Traineau


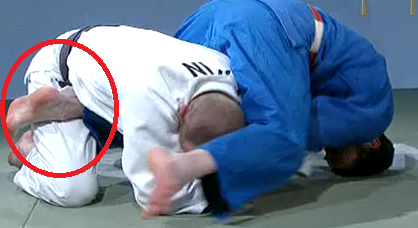
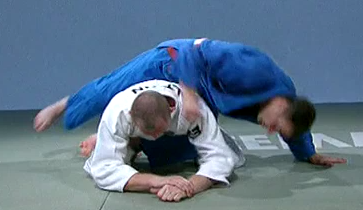
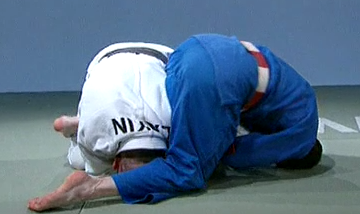
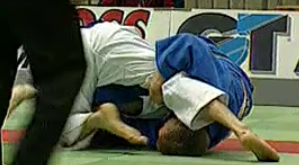
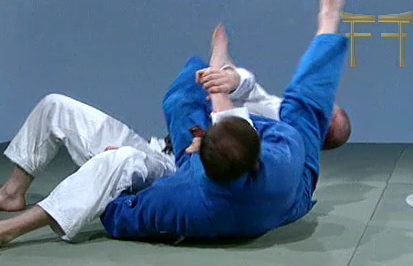
Having covered Neil Adams' roll into Juji gatame, during which I mentioned the Iatskevitch roll. I thought that I would cover the Iatskevitch and explain what I was referring to, as well as covering another popular entry into Juji gatame.

These two entry methods are named after the men that made them famous in the world of competitive Judo, Alexander Iatskevitch and Stéphane Traineau.

Iatskevitch Roll

The Iatskevitch roll commences by either attacking a turtled uke by pulling up on their collar and lapel or taking advantage of an uke who is not acting defensively in a transition situation.


You insert the leg across uke’s thighs and hook the instep of your foot against uke’s far thigh.


You firmly clamp your foot against uke’s thigh creating pressure.


This pressure gives you stability as you lower your body. You place the hand closest to uke’s hips on the floor for stability.


Then balance on the crown of your head and your hand closest to uke’s hips


You insert the free, head end arm, catching the crook of uke’s elbow


You bring your un-inserted leg round and brace it against the crown of uke’s head


Then insert your leg end arm catching uke’s thigh. At this point you can choose to hold the thigh, hold the trousers or hold uke’s ankle. It is illegal to hold inside the trouser leg in both Judo and BJJ


If you fail with catching the first leg to illicit any movement you can transfer to the far leg as this sequence shows:


You roll onto your side


At this point many people make a major mistake with the technique. Many people attempt to rotate uke through the vertical axis like so


This is very difficult to do on someone heavier than you and is a much less efficient action than the correct original Iatskevitch action.


In the original Iatskevitch action uke’s legs are taken throught the horizontal plane around tori’s head. This is a far more effective and efficient action requiring much less strength.


At this point it is important to control the descent of uke to the tatmi so that they don’t have enough momentum to continue the roll and spoil your technique and so that you can bring the leg over the head to control them for applying the submission.


Once in position stabilise yourself and apply any grip break you prefer or favour.
 
Traineau Roll

An alternative entry is the Traineau method of achieving Juji gatame which is quite well suited to BJJ practicioners as it gives you lots of options for attacking the back.

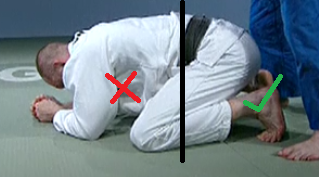
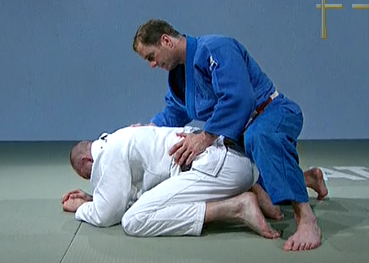
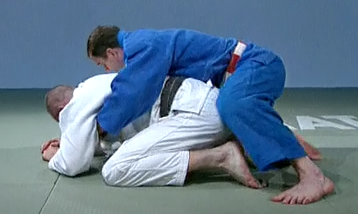
You start off attacking the turtled uke from their rear right or left corner never directly from the side.

As a the first major action of the turnover involves catching uke’s far side lapel. In Judo this is commonly countered by tori catching and wrapping the arm that has caught the lapel and then rolling to pin uke. In order to prevent this you must stay at the rear of uke with the bulk of your weight.

The area indicated in green is safe, that in red is dangerous to have the majority of your body and weight placed.


As an additional precautionary measure against getting caught and arm rolled, the leg is elevated and placed either in between uke’s legs or behind their buttocks.

Yes I know what it looks like...

Tori  then reaches round and secures uke’s far lapel underneath the armpit. Its very important not to grip too low or high. 


On the near side of Uke you grip on their tricep


Then tori rolls to the side he is gripping the tricep on, in the examples pictured this is over the right shoulder.
The tricep grip pictured mid roll


As this technique is geared around a Judo context it is expected that once tori and uke are on their sides uke will attempt to roll onto his front. However, the beginning of the roll can be integrated into an attack that is better suited to the psychology of a player operating under different rulesets. 

Uke is assumed to seek to roll to his stomach to escape the roll and attempt to force a stall and stand up


As uke rolls away from tori’s body tori’s lower left leg is freed.

The lower leg that has been freed is then brought behind uke’s head.


There should be firm pressure being exerted by both the right leg and left leg to control both uke’s hips and head to keep them in position.

 Two important actions are then commenced simultaneously. Tori’s right leg moves to control uke’s hips whilst uke’s lapel hand releases the lapel. Uke inserts his forearm deeply into the crook of uke’s elbow.


As tori inserts his arm and uke rolls away,  the left leg is freed, tori brings his right leg so that the foot is placed on the ground and that the calf is brought in against uke’s stomach so that the calf and ankle are braced tightly against uke’s stomach.


Once this position is established tori draws his arm, that is inserted into the crook of uke’s elbow, upwards and into tori’s own chest to create space and fully expose the arm.


Once you have created space and exposed the arm you then secure it using the figure 4/ ude garami grip.


The next step is to bring the leg that is positioned behind uke’s head around their head so that you can apply the juji gatame.

I like to employ a double stab approach. In which I bring the leg so that the foot is level with uke’s crown and then move so that the leg is in front of uke’s face.


I personally find that this keeps the transition and the whole technique tighter, however, if you want you can do the movement in one step. It is personal preference.

Once in position with your leg in front of uke’s face you can then sit back and apply whatever grip break is your preferred. If you struggle with how to break the grip for Juji gatame and often fail to straighten the arm see here.

I hope this post has been useful and that some of you have found something new to take away from it.

Sunday, 13 February 2011

The Secret to Neil Adams' Juji roll - hidden in plain sight


The Adams roll is almost entirely dependent on pressure and pain to induce uke's roll and as such is brutally effective.

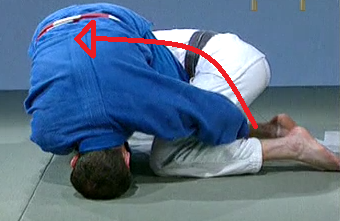
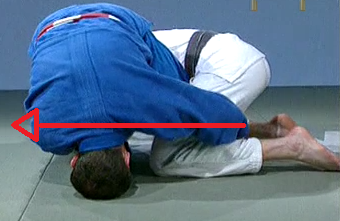
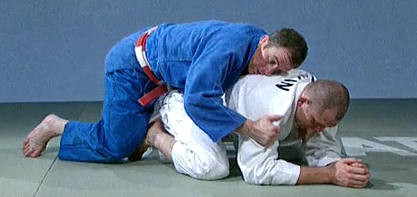
You enter for Adams roll by inserting one leg in between a turtled uke's legs. Then you do what Adams calls 'the catch'. Adams favours attacking on uke's left side, but most people prefer doing it on the right, Adams inserts his left leg in between uke's legs, like in then he 'catches' uke's with the arm closest to uke's feet. He inserts it palm up and as he inserts it he drops into position using his right arm and head for stability.

Adams inserts the leg

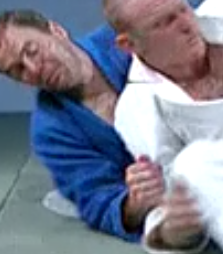
Adams 'catches' the arm.


The right arm and head are very important for stabilising yourself in establishing the arm control. Your head musn't be too close to uke's body and you want your body to positioned so it is almost forming an L shape with uke's body. Your body forming the horizontal line of the L and uke's the vertical.


Once you have your right hand and head on the mat you start to use your left arm to draw out uke's caught arm. Putting pressure on the inside of the elbow to create space.


Then balancing purely on your head bring your right hand in to grasp uke's wrist with your right hand and then grip your own right wrist with your left hand.


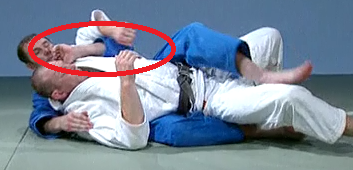
The core of the Adams roll has now been estbalished. This ude garami grip is what generates the pressure that causes uke to turn. 


You then use your leg and stomach muscles to stretch out uke's caught arm whilst holding with the ude garami grip. This is why leaving big enough gap between your posted head and uke's body is vital otherwise you hurt your own neck and can't do it. Adams is almost applying an upside down bicep slicer from the turtle at this point and done properly it is already starting to hurt.

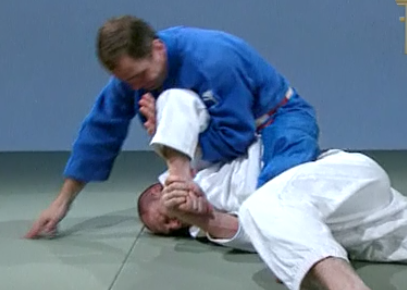
You now bring your right leg round and place it at the top of uke's head or if you can manage it under uke's head, on their face. Many people though prefer placing it on the top of uke's head. Adams aims to bring it under uke's face so that when he rolls he doesn't have to swing his leg over to catch the head.


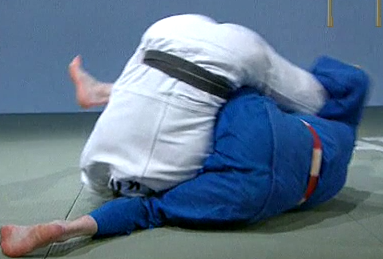
Now you turn onto your side twisting uke's arm, holding with the ude garami grip, towards his head and keep on twisting towards his head so that there is so much pressure and pain uke wants to roll over to escape it. Adams is simultaneously applying a bicep slicer and a shoulder lock as he does this move.


To assist in the roll Adams uses the leg that was inserted in between uke's legs as a hook to help bring the lower part of uke's body over with him. Although the core of the technique remains the pressure applied to uke's elbow and shoulder through the ude garami grip which makes them want to roll to escape it.

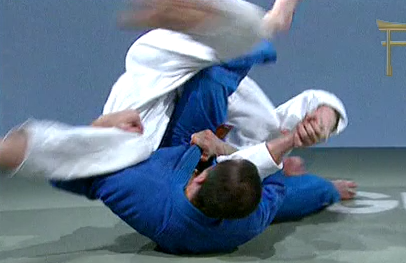
Uke then starts to roll, use your foot to assist them over and control their roll so that you keep everything tight once their land on their back and maintain the ude garami grip. If you didn't manage to get your foot under their face as they complete their roll bring your foot round and over their face to prevent them escaping.

Then use whatever methods you feel most comfortable with to break any defensive grips uke may have established.

I can not emphasise enough how important getting the ude garami grip on uke's arm is. If you don't do this and your fighting anyone who's as strong or stronger or as heavy or heavier you basically won't roll them unless you go for the Iatskevitch legs option, but to do that entails switching which arm you're gripping uke with so you might as well ude garami whilst you're there...

The majority of people who attempt the Neil Adams roll aren't aware of the importance of the ude garami grip and it is even taught as the Adams roll by people without the ude garami grip.

The turnover is a personal favourite of mine because it is incredibly powerful and also because it can be done succesuflly with or without a gi. However, I would say that giving up the back mount to pursue this turnover in an MMA ruleset would be a lot riskier than in Judo or BJJ. So if you compete or train under that ruleset you may want to exercise caution when attempting this turnover.