I think that Sasae tsurikomi ashi is one of the most underrated and overlooked throws in Judo, which is a shame, because it is a fantastic technique with which you can score massive ippons and create movement and openings for a whole host of throws.
This is going to be a looser and less logical structure than I normally do, basically, because I couldn’t come up with a satisfactory structure.
Anyway without further ado, to business.
Offsetting
I have previously discussed the principle of offsetting for throws in my piece on O soto gari.
Offsetting as a principle is important to O soto gari, Sasae tsurikomi ashi and Hiza guruma and once you appreciate the principle of offsetting and start applying it in your uchikomi and randori you will see a dramatic improvement in your throwing.
Offsetting as a principle is important to O soto gari, Sasae tsurikomi ashi and Hiza guruma and once you appreciate the principle of offsetting and start applying it in your uchikomi and randori you will see a dramatic improvement in your throwing.
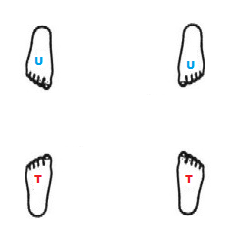
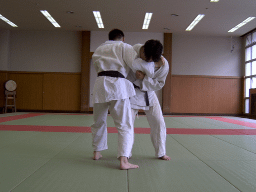
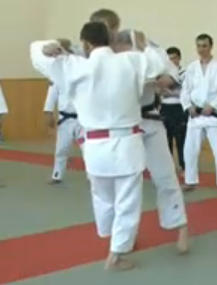
Normally in practice for uchikomi and nagekomi we start off with our feet parallel with our partners, like so:
This is fine and correct for the majority of throws, however, starting off like this is the root cause of many structural problems with people's Sasae tsurikomi ashi.
Starting off parallel means tori has to step diagonally to position himself for the throw.
The problem is that this means tori will lean back diagonally away from uke.
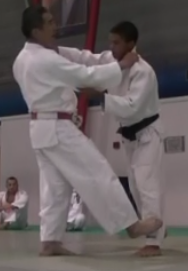
The result of practicing like this in uchikomi and nagekomi is that in randori your Sasae will look like this:
Your posture is wrecked, uke’s balance isn’t broken properly, you have no real control over uke and you either topple backwards or you get leg grabbed and thrown for ippon.
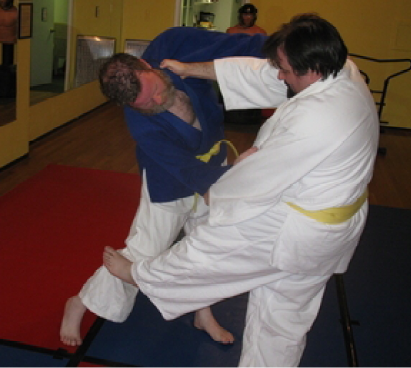
In Sasae tsurikomi ashi, and all Judo throws, keeping posture is vital. In Sasae tsurikomi ashi you should rotate your upper body, but have it remain basically straight.
So it’s crucial to offset yourself before you begin any uchikomi or nagekomi.
Due to the importance of offsetting you frequently see Sasae tsurikomi ashi used and resulting in massive ippons when you have extreme right on right stances, in which the feet are naturally in the offset position.
Offsetting on the move
A lot of people and beginners especially struggle with Sasae in moving uchikomi and nagekomi mainly because the concept of offsetting hasn’t been explained to them, but also because those who have sort of sub consciously figured it out struggle to apply it on the move.
Once presented and explained, however, the process is relatively simple.
It is described here for a sleeve side Sasae, reverse the actions for a lapel side Sasae.
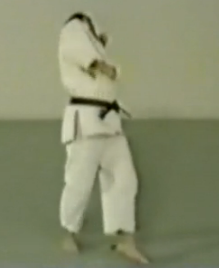
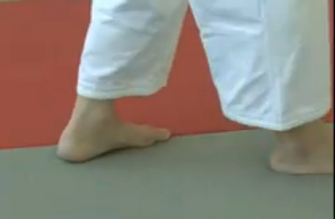
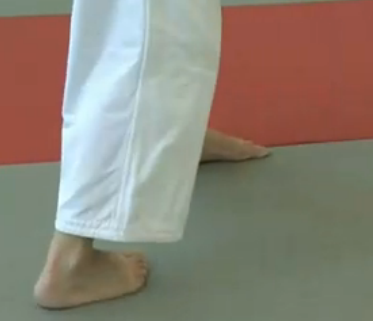
Tori begins retreating and when comfortable with the rhythm retreats with his left foot, assuming a right handed tori.
Tori then retreats his right foot in a backwards J type motion.
A visual example is presented below:
Timing
A common mistake and cause for throw failure when attacking with Sasae tsurikomi ashi is attacking the foot when it is already advanced and planted.
It’s very hard to throw uke when the foot is fully advanced unless uke is very unskilled or tori is very strong.
An analogy I like to use to explain the timing for Sasae is to imagine you’re carrying a big box so that you can’t see the floor. Whilst walking you stub your foot as you plant your foot and you stumble you may fall but it will be slow and you have a chance of recovery. However, if whilst walking you step and catch your foot as you’re stepping then you go absolute flying and break whatever’s in the box.
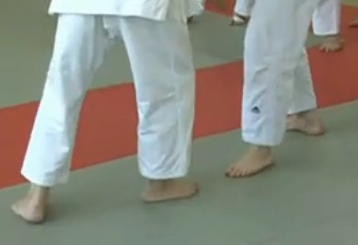
So in Sasae tsurikomi ashi you need to block uke’s foot as it meets the midway point, between being fully retreated
And fully advanced
You block uke’s foot as it advancing foot as it comes level with his planted foot
As uke is in the middle of transferring his weight, blocking the foot halfway through the movement will send uke flying.
Use of the hands
Part of Sasae tsurikomi ashi’s usefulness lies in the fact you can use it to both left and right without changing grips.
When performing Sasae to the sleeve side it is vital that you perform a correct, canonical tsurikomi action. The throw is after all, called, Sasae tsurikomi ashi.
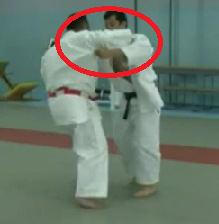
This requires a smooth, strong and continual pull with the sleeve hand and good forearm contact on the chest with the tsurite hand. Lots of chest contact, ensuring the forearm fits into the pocket created by uke’s armpit.
When performing Sasae to the lapel side, which is more common, you have a choice of tsurite hand being in the traditional pocket position.
Or to have the elbow flared upwards
When performing Sasae to the lapel side the action on uke’s sleeve is vital to ensuring correct rotation and completion of the throw.
Tori must position his hand under uke’s elbow and drive it upwards and around in a strong wheeling action.
Combinations
One of the great things about Sasae is how many opportunities for breaking down defence, creating movement and creating throw opportunities it allows. Sasae can be used as a preparatory technique or combined with just about any forward throw, common ones are Tai otoshi, Seoi nage and Uchi mata.
However, due to a lack of quality video material demonstrating those combinations I will discuss Sasae and its ‘sister’ throw O soto gari and a combination I believe to be one of the best in the whole of Judo – Sasae tsurikomi ashi to Okuri ashi barai.
O soto gari and Sasae tsurikomi ashi are perfect partners because of how easy it is to link them in the action reaction sequence and how, when done properly both can elicit such massive reactions that make the subsequent action very easy and very powerful.
Katanishi outlines the action-reaction sequence
Yamashita adds further
And the video reversed to show how it would look for a right hander
Sasae tsurikomi ashi to Okuri ashi barai is, for me, one of the most awesome combinations in Judo, because it combines two very difficult techniques that when done properly result in enormous ippons and rely on subtlety over brute force.
I have a mighty tally of one male white belt and one female brown belt that I have felled with this combination in randori. However, they hit the mat very hard and very unexpectedly that it knocked the wind out of both of them. That’s how powerful a combination in can be even in the hands of a spud like me.
In the combination tori attacks with Sasae and uke manages to step off or over it. To do this uke has to over extend the leg that has been attacked as part of the Sasae attempt and as such needs to bring his trailing leg to his advanced leg in order to regain his balance. It is this recovery action that is exploited and attacked with the Okuri ashi barai.
As uke is still trying to recover balance and defences from the Sasae and this is a very uncommon and unexpected combination when you catch them with the Okuri ashi barai uke gets really launched.
This video demonstrates the movement pattern, tori doesn’t actually apply the Sasae but the stepping pattern is exactly the same. Note this combination is usually done with a lapel side Sasae as it makes the Okuri ashi barai easier.
Why not try and have a play with making your own combinations from Sasae tsurikomi ashi, however, remember to observe proper spacing and positioning
Hopefully that has given you some greater insight into a great, but underrated technique and has given you some ideas to improve your Sasae tsurikomi ashi.






I have to tell you that this is absolutely one of the best descriptions of Sasae Tsuri-Komi Ashi that I have seen, other than being there with a skilled Sasae expert. This study must have taken you many (enjoyable) hours to harvest the photos and videos. The videos and pictures that you chose are just perfect. Lots of critical detail, needed to make Sasae work.
ReplyDeleteGood for you sensei.
Thank you very much for your hard work putting this together.
ReplyDelete