Sunday, 30 January 2011

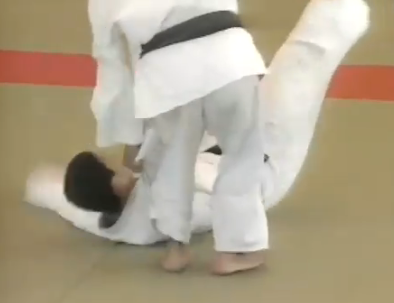
Attack Chest


Before I begin I would just like to say hello to all those who read this blog from the non- Anglophone world.

To those of you reading in Spain, Russia, France, Germany, Poland, Iceland and elsewhere; Muchas Gracias, Большое спасибо, Merci beaucoup, Vielen Dank, Dziękuję and Takk fyrir.

I have received many requests for doing a piece on ‘kuzushi for backwards throws’. This is probably because in my previous pieces on kuzushi I have focused mainly on forward techniques.

If you review those articles you will find several points that transfer across applying kuzushi for forward throws and backwards ones.

The four of the most salient are:
Coordinating both hands to work together
Generating power from the lower body
Applying kuzushi in a continuous manner throughout the technique

No matter how good your kuzushi is it must be combined with; control, positioning and an awareness of and ability to capitalise on, the moment of opportunity.

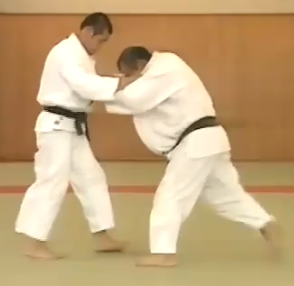
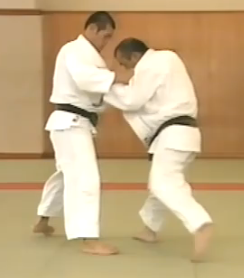
The central principle I want to convey in this article is that when attacking with a backwards throwing technique it is crucial that you concentrate on attacking the chest. The reason behind this is that attacking the chest means you ideally gain control over the upper body and head and use it to disrupt uke’s balance.

If you take a moment to stand up and conduct a little experiment you will know what I am talking about.

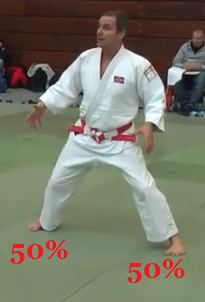
Adopt this posture


Legs evenly spread head above hips and everything set so your weight is equally distributed.

Now without moving your feet at all, move your head about 12 inches to the right.

You should now feel the majority of your weight concentrated in your right leg.

Now return to the original balanced posture.

Now move your head 12 inches to your rear.


Did you fall over?

Then you’re a muppet.


Now sit back down again.
The point behind this is that where your head goes your weight will follow as your hips shift under you and your balance is transferred.

This is why attacking the chest is important because attacking the chest will move the head, which will shift a person’s entire balance and destroy their equilibrium.

Using the hands

So let’s look at the principle of attacking the chest in action.
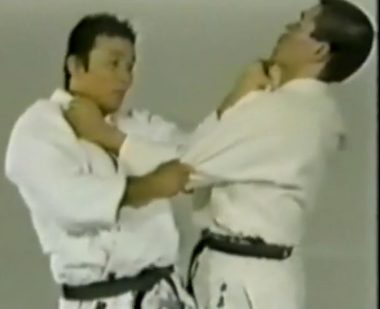
To properly attack the chest requires correct positioning of the tsurite arm as in the tsurikomi action this is one of the most poorly done, most misunderstood and abused kuzushi actions in Judo.

Your forearm must be against uke’s chest


And in the majority of throws you should seek to attack upwards towards uke’s chin.

The number one error amongst beginners when trying to induce kuzushi for backwards techniques is to raise their elbow in the air in a chicken wing motion.


This is anatomically very poor for power transfer and normally in beginners has the effect of pushing the partner away from them rather than breaking their partner’s balance.

So the correct tsurite action for most backwards throws involves the forearm making sustained contact with uke’s chest.


The other critical hand action is the coordination of both the tsurite and the hikite hand. The two hands should work together in a smooth controlled action to effect kuzushi.

In this video Yamashita demonstrates and emphasises these two important principles attacking the chest with forearm contact and coordinating the actions of the tsurite and hikite hand.


Sustained forearm contact is observable as a core component of balance breaking in all of the family of ‘gari’ techniques.

Ko uchi gari


Ko soto gari


O uchi gari


Chest to Chest

Along with correct and coordinated use of the hands a central component of balance breaking for backward throws is how tori positions his upper body.

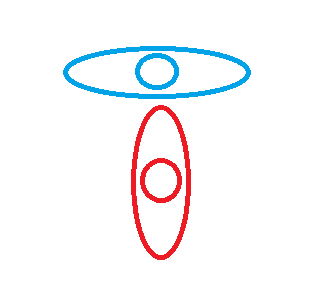
A common error is that tori has his body twisted too far so that it is perpendicular relative to uke’s body, like so:


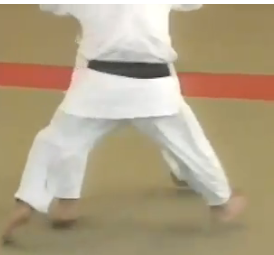
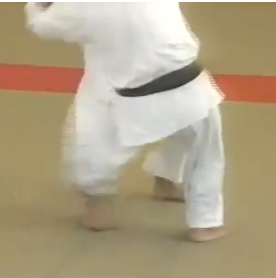
Whilst its physically very difficult to keep your chest directly parallel to uke’s for throws like O uchi gari and Ko uchi gari, tori should endeavour to keep his chest as close to parallel with uke’s as possible. 

Here in an example of Ko uchi gari, tori has rotated his shoulders so that they’re roughly parallel to uke’s 


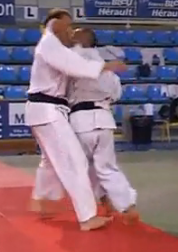
Here in O uchi gari, tori has managed to achieve direct chest to chest contact whilst entering


Chest to chest contact is not a cast iron rule so much as it is an aide memoir for several key facets of effective balance breaking for backwards throws. The most important being that the impetus for the entry to the technique comes from the hips and that the hips of tori should be below those of uke.

Hips

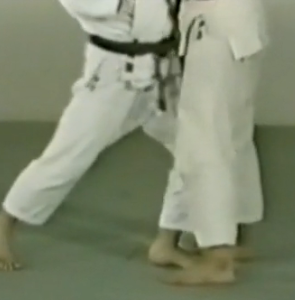
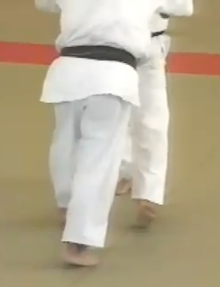
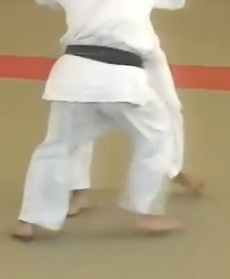
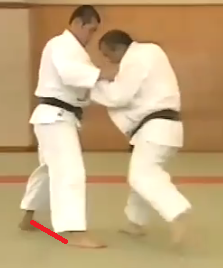
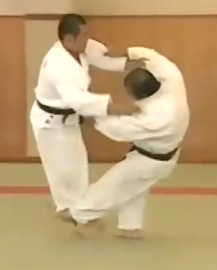
Another central mistake when entering for throws which is reflected in poor application of kuzushi, for backwards techniques, is that tori’s hips are above those of uke’s upon entry.

When attacking with a ‘gari’ technique it is pivotal that during the kuzushi and tsukuri phases to not only lower your own hips, but also to apply kuzushi in such a manner as to raise uke’s hips.

In this video Shozo Fujii demonstrates Ko uchi gari,


Fujii shows the utilisation of the tsurite to disrupt uke’s balance and shift uke’s weight onto his heels whilst raising his hips


Here he shows the positioning of his hips below those of uke


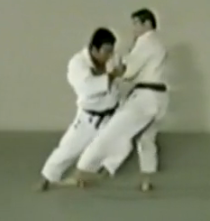
In a dynamic situation you see the full extent of the height differential between tori’s and uke’s hips


This principle is also reflected in:

Ko soto gari


O uchi gari


Positioning the hips below uke’s demonstrates not only correct application of kuzushi, but also that tori’s kuzshi and tsukuri was generated from the hips as a whole body action rather than merely from the upper body. 

So when executing kuzushi for backwards throws and in particular those from the ‘gari’ family. It is vital to attack the chest using the correct tsurite action in order to shift way through affecting the positioning of the head, to achieve chest contact and to generate power from the hips in order to apply it in a concentrated whole body action to attack the chest.

Thursday, 27 January 2011

Okuri ashi barai - How I think it should be taught


First lets examine this truly sublime video of Okano sensei practicing Okuri ashi barai.


Now this video is probably how most of you have been taught and practice Okuri ashi barai


First of all I’m not saying that the above method is wrong or that it is bad technique. However, I believe the method shown in the Okano video is better , more realistic and incorporates key principles better. 

So let’s look at what Okano does differently. Well he practices the technique against an uke who is retreating in a straight line and then he performs a large outward step diagonally to his right causing uke to adjust his movement pattern and creating a reaction that makes a perfect moment of opportunity for Okuri ashi barai. 

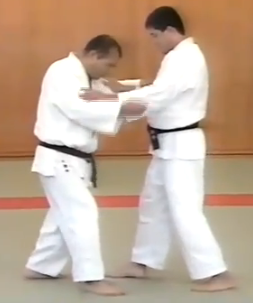
Okano begins advancing towards his retreating uke following a normal stepping pattern:


Beginners an important note. In ashiwaza drills tori should always establish the pace of the practice. Also many beginners mis-step so tori advances with his left uke retreats with his left. 

To set a good rhythm and ensure that a correct stepping pattern is in place, assuming a right hander practicing with another right hander, rotate your sleeve hand slightly away from you and push straight forwards as if your forearm was a piston. You perform this action simultaneously with you stepping forward with your left foot. This not only ensures uke reacts appropriately, but also signals your clear control of the rhythm and direction of movement. 

After several steps Okano is comfortable with the rhythm and is ready to initiate the action-reaction sequence.
Stepping normally with his left he prepares to take an exaggerated step diagonally outwards with his right.


Seen from another angle:


Mid way through the diagonal step


The full extent of just how deep a diagonal step Okano takes, this is more for demonstration and practice purposes than for randori. To drill the concept into your movement.


This action sets in motion uke’s reaction which is to adjust his stepping pattern in a way that will bring his feet together. Simultaneously it creates a situation of what I pompously call ‘dynamic delay’.


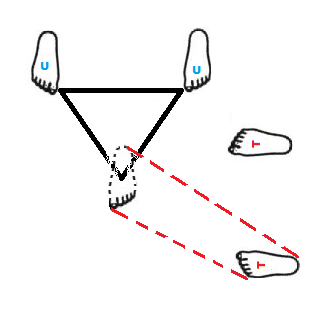
The red charts the direction of uke’s right foot towards his left.

Dynamic delay is very hard to capture in words or in still images, however, if you watch the video again you will see what I mean. The concept is also well demonstrated in this video

Especially at around 1:40.


Okano, in possession of perfect timing, utilises this dynamic delay to bring his sweeping foot through so that it catches uke’s retreating right foot at the perfect moment. 


Seen from a different angle


The action reaction sequence set in process by the diagonal outwards step allows Okano to accelerate the motion of the unweighted retreating right foot with his sweeping foot so that it contacts uke’s left foot as it is being unweighted, but before the right foot can be re-weighted.

As this image demonstrates uke’s feet are now totally unweighted and Okano’s sweeping action takes them both clear of the floor.


From a different angle:


The inevitable occurs, a beautiful ippon throw.


Now, after that waffle breakdown, why I believe this to be a better model for teaching and practicing Okuri ashi barai.

Firstly pace, pace and rhythm are fundamental to ashiwaza. In the usual method of the sideways skipping pace management by tori becomes very difficult. Uke and tori end up either in a race together to see who can do it the fastest, or completely at odds leaving tori either too far ahead or too far behind uke. The advantage of the straight walk then diagonal step method, catchy name I know, is that tori has complete control over the pace throughout and can pick his moment to initiate the diagonal step when he is comfortable with the rhythm of the drill.

Hands and feet, because of the pace problems outlined above the sideways skip method means it’s very difficult for people to coordinate their hands and their feet because they’re usually in such a muddle over getting the feet right the hand action goes out the window or vice versa. Because of tori’s control over the pace and moment of attack the ability to coordinate the hands and feet is much increased. Also the drill can be broken down into stages, first walking through with a partner developing just the diagonal step, with only the hands resting on each other. Then walking through incorporating a gentle sweeping action brining the two feet together rather than a full sweep, with only the hands resting on each other. Then you can bring in the proper grips with a gentle sweep, working on coordinating kuzushi and the foot action. Then proper grips with a full sweep. This incremental method takes longer, but is a much richer learning process developing the key coordination and movement skills at each step.
 
Realism. One of my major gripes with the sideways skipping drill is that people get their lesson on it then when randori comes they immediately try taking over 9000 sideways skips to get the rhythm. Their opponent isn’t a retard and knows what they’re trying to do and doesn’t co-operate and the result is total failure, disappointment combined with a sense of being misled and abandonment of the technique. 

Using the method in the Okano video is better because it teaches ‘leading uke’s mind’ and the key principles of changing direction, pace and understanding of weight transfer that are required for good ashiwaza. The awareness that it isn’t about gallivanting round the mat like a prize stallion and that the key lies in subtlety and awareness of movement and moment of opportunity is a much better ashiwaza mindset to instill and much more realistic for randori and competition. 

So to close, I don’t believe the side skip method is wrong or bad practice or that no one can learn Okuri ashi barai from it. However, I believe its quite a difficult drill and is easily abused and misunderstood by beginners and not so well informed coaches. I believe the method demonstrated in the Okano video is simpler, easier to learn and teaches the fundamentals more effectively. 

As a final thought I’ll leave you with this video of Osawa sensei now 10th dan then 8th dan demonstrating Okuri ashi barai.


Tokuiwaza


 One of the most common questions asked by beginners is ‘What should my tokuiwaza be?’ normally followed by a description of how tall, heavy, long legged etc... they are.

The first thing that a beginner should be aware of is that your tokuiwaza isn’t the holy grail it isn’t some technique that will suddenly unlock for you the world of Judo. Indeed your tokuiwaza needn’t be one single technique. Nor does the fact you haven’t ‘found’ your tokuiwaza yet matter much. Over the course of your Judo development your tokuiwaza will naturally emerge, but if you’re a yellow or orange belt etc... and still don’t really feel like you have one then don’t fret it will come.

The second thing is not to obsess over your body type or particular physical attributes and assume that certain techniques will forever be off limits to you because you’re a certain size. Its often said that Uchimata is a tall mans throw, yet some of the most spectacular Uchimata that I have been thrown with have been by people smaller than me and conversely I have been thrown with enormous standing Ippon seoi nages by people who are taller than me.

That is not to say that body type or attributes doesn’t play a role in what tokuiwaza you will likely gravitate towards. They way body type impacts your ability to perform a throw is in that it either increases or decreases your margin for error. Margin for error is the, probably unscientifically quantifiable, gap whereby your physical attributes allow you to compensate for the technical deficiencies of a throw. There is no set formula whereby for every inch of height, pound of weight and unit of strength your margin for error for throw Y increases or decreases by X percent. However, in general the taller, heavier and stronger you are the greater your margin for error with the majority of throws will be. This is why the legend of Judo and BJJ that the smaller man can beat a bigger man is only true when the skill level is very strongly in favour of the smaller man. A small man fighting a bigger one with equal skill level will nearly always result in the smaller man losing. A small man fighting a bigger man where the bigger man has the higher skill lever will always result in the small man losing, barring some freak occurrence.

Another issue with beginners struggling to find their tokuiwaza is that very often beginners are subjected to a technique tsunami. Constantly shown different techniques every two weeks and with each dan grade they ask showing them their own personal variations on those techniques and some even showing techniques they have made up themselves...

As a beginner there is no need for you to look any further than the Dai Ikkyo and Dai Nikyo of the Gokyo. And stick to the kihon waza – the core/basic - forms of the gokyo, if you’re a kyu grade please don’t start fucking about with a two hands on single sleeve style Tai otoshi, just because you’ve seen it on a Lee Won-Hee highlight reel and think it is cool.

Dai Ikkyo
De ashi barai
Hiza guruma
Sasae tsurikomi ashi
Uki goshi
O soto gari
O goshi
O uchi gari
Seoi nage

Dai Nikyo
Ko soto gari
Ko uchi gari
Koshi guruma
Tsurikomi goshi
Okuri ashi barai
Tai otoshi
Harai goshi
Uchi mata

Contained within these two groups are all the throwing options that a beginner would need.

Also it is important to note that the Gokyo was ordered according to the difficult of the ukemi from a throw, so you will see De ashi barai is the first technique because it is a simple Yoko ukemi. So by sticking to the first two sets of the Gokyo you will be also ensuring the safety of whoever, you as a beginner, practice with because the falls will be easy for other beginners to take and the higher grades will have confidence in allowing you to achieve and throw them, due to there being less chance of a beginner messing it up. This is not the case for throws that come later in the Gokyo like Kata Guruma, Harai makikomi, Ura nage and Yoko gake.

In addition no matter what Judo club you attend and no matter in what country, your coach should be familiar with and be able to teach all of these techniques and there will be plenty of experienced players who can help you with these techniques.
So once you have looked down the above list of techniques there are probably some that jump out at you as techniques that you’re good at, or that feel ‘right’ more so than others.
You should then take those standout techniques and fit them into the following catergories:

Major forward technique
Complimentary ashiwaza

Major backwards technique
Complimentary ashiwaza

Looking back at the two sets of the Gokyo you will notice that there is a wide selection of ‘major’ techniques and ashiwaza to go with them.

Techniques that are generally considered ‘major’:
Uki goshi
O soto gari
O goshi
Seoi nage
Koshi guruma
Tsurikomi goshi
Tai otoshi
Uchi mata
Harai goshi

Techniques that are generally considered complimentary ashiwaza:
De ashi barai
Hiza guruma
Sasae tsurikomi ashi
O uchi gari
Ko soto gari
Ko uchi gari
Okuri ashi barai

There are some cross overs but this is a rough division.

So let’s look at a few examples of technique tables you could build:

Major forward technique – Uchi mata
Complimentary ashiwaza – O uchi gari

Major backwards technique – O soto gari
Complimentary ashiwaza – Sasae tsurikomi ashi

-------------------------------------------------

Major forward technique – Tai otoshi
Complimentary ashiwaza – Ko uchi gari

Major backwards technique - O uchi gari
Complimentary ashiwaza – Ko uchi gari

-------------------------------------------------

Major forward technique – Harai goshi
Complimentary ashiwaza – O soto gari

Major backwards technique – O uchi gari
Complimentary ashiwaza – Okui ashi barai

The reason that you should try and fit the techniques that standout for you into the catergories as above is that it allows you to create not only a idea of techniques that you are going to concentrate on but it gets you to think about linking techniques and developing effective combinations. The logic behind which techniques you combine with others is to take advantage of the likely potential actions and reactions of your opponent. So an O soto gari is likely to get a resisting forward reaction which can then be capitalised on with a Sasae tsurikomi ashi etc...

The quick witted and the lazy amongst you will have noticed that you can effectively halve your workload by being smart about which techniques you choose. 

For example you can have:

Major forward technique – Uchi mata
Complimentary ashiwaza – O uchi gari

Major backwards technique – O soto gari
Complimentary ashiwaza – O uchi gari

Thus you only have three techniques that you need to concentrate on and all the three techniques can be used as either a primary or secondary attack for the other. I can attack with O uchi gari and then with O soto gari, O soto gari then Uchi mata, Uchi mata then O uchi gari etc... etc...

Reducing your workload as such can be helpful because it means you always know what you’re going to work on during uchikomi and nagekomi, when it comes to combination practice you never have to stop and try and work out what to combine with what you just practice your set of combinable techniques.

However, it can become boring for some and attacking with only three throws in randori can mean that people take steps just to kill your chances of using those three throws. So it is often a good idea to add in an extra technique to your practice every once in a while to keep things interesting and your opponents on their toes/heels.

Many of you will have noticed that I have outlined a plan for developing not just one technique, but a group of techniques as part of finding your tokuiwaza. This is because often a beginner will pick one throw that they think works for them and then become dead-set on it being their tokuiwaza even if it isn’t really suited for them, for whatever reason. So it is best to have a family of techniques that form your tokuiwaza, because as you progress and develop you my find you move about within the family before settling on a technique that you didn’t think was your best one. So in the above example of O uchi gari, O soto gari and Uchimata initially you may consider O uchi gari to be your best technique but as you practice it may shift to Uchimata and then end up being O soto gari.

This process means that not only do you avoid a potential technique dead-end, but also you will have spent time ensuring you have a good grasp of three throws that work well together not just one throw in isolation, so that if you encounter someone who can nullify one or two of your techniques you always have another attack.

Also that I split up the techniques into major forward and major backwards techniques so you’re building into your training the principles of action-reaction as you learn the interplay between the complimentary ashiwaza and the ‘major’ techniques.

I have in this post concentrated exclusively on standing tokuiwaza, however, the principle behind my approach of developing a family of complimentary tokuiwaza based around action-reaction should also be applied to how you approach finding a newaza tokuiwaza.

Slicing a traditional throw in half


This is one of two exclusive posts written to christen the start of this blog, the other is Silver Bullets.

It’s only natural to want to emulate our idols and when it comes to Judo this usually means copying the signature throw variation of a highly successful Judoka. When a highly successful Judoka bursts onto the scene whether a new or unusual variation of a canonical technique there will follow a craze of copying that throw amongst us mortals involved in recreational Judo. Usually the start of this craze is closely linked to the release of a Fighting Films dvd...

In this entry I will examine and seek to dissect two of the most famous Judokas of recent years technique’s. Toshihiko Koga’s Ippon seoi nage and Kosei Inoue’s Uchi mata. 

Inoue's Uchi mata

I'll examine Inoue's Uchi mata first because its one I feel is mechanically easier to get your head around.
As with any throw we should remember first principles about spacing - the triangle and correct breaking of balance

As these are all observed in Inoue's version of uchi mata.

Lets examine Inoue's uchi mata


Inoue first demonstrates the canonical hikidashi entry method whereby he first steps in with his right foot and then brings in his left foot as a supporting/pivoting foot and his right leg sweeps through uke.

The canonical hikidashi first step:


Inoue's oikomi Uchi mata first step:

Inoue 'slices the traditional Uchi mata in half' in the words of Neil Adams. As he enters with a single Oikomi entry step.


Here we can see Inoue preparing for his entry, weighting his uke:


Inoue then enters, the foot is either placed horziontally to the line of uke's toes or horizontally:

Inour still observes the triangle with his initial step and applies a strong tsurikomi action to effect kuzushi as can be evidenced by his uke being on his toes.


The space observable between Inoue's hips and his uke's as a result of observing the triangle are vital as it allows space for his uke's balance to broken forward and his own hips to fit into:


The combination of expert tsurikomi and kuzushi throughout the tsukuri phase means Inoue's uke is completely loaded onto his hip allowing Inoue to sweep the leg through to effect the Uchi mata


A perfect ippon scoring technique:

Inoue's method of  entry can be applied to other throws on a retreating opponent and a static one


At this point the throw can become a Harai goshi, Tai otoshi, Ashi gurma, Koshi guruma, Tsurikomi goshi etc...

Koga's Seoi nage


This video shows Koga's seoi nage in application in a kenka yotsu situation. However, it reveals some fundamentals about the entry that are applicable to both kenka and ai yotsu.

Koga starts in a kenka yotsu situation.


His first step observes the correct spacing and the triangle principle

Similarly to the Inoue stepping pattern the first step is not with the normal right foot, but rather with the left.

 Koga's initial step observes the triangle and allows himself space to break uke's balance forward and insert his hips, which comes with the next, deep step.


Crucially here Koga performs a tsugi ashi style step


Before stepping deep with the right foot.


From a different angle and in a dynamic situation it looks like this:

Koga uses his extraoridnary tai sabaki and movement skills to position himself perfectly for the entry.


Observing the triangle with his initial step, he inserts the other leg deeply, because of the space he has given himself.


And the throw is completed in a picture pefect manner:
The main error seen when people try and copy Koga's seoi nage entry and indeed in many normal seoi nage is that they get to this position:

And then attempt to reverse into uke to effect the throw:


However, what you should be aiming to from this position is to project uke forward as much as possible whilst manouvering your hips under their centre of gravity.

The disrupting of uke's balance through forward projection and movement of your hips under their centre of gravity is what effects this devastatingly effective throw.